LABORATORY: CNR INO
NAME OF THE INSTRUMENT
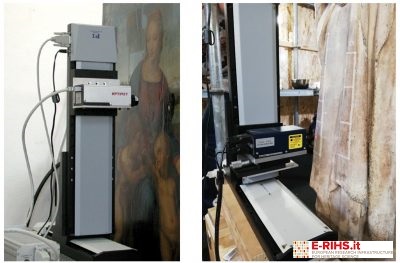
Laser scanning microprofilometer
GENERAL DESCRIPTION
System for 3D data acquisition have reached a high degree of precision thanks to the recent advances in laser technology, which made it possible to obtain topographic maps of the examined surface allowing the measurement of three-dimensional details with hitherto unthinkable micrometric resolution. High-resolution 3D survey of almost flat surfaces has proved extremely useful for quantifying the extent of detachments and craquelure in paintings, for documenting the state of conservation of the material layers, and for monitoring deformations and morphological changes of the support due to environmental agents or restoring interventions. Micro-profilometry provides the survey of a variety of surfaces, regardless of their chromatic, reflection and diffusion properties, in a completely non-contact and non-invasive way.
TECHNICAL DESCRIPTION
The optical micro-profilometer developed at CNR-INO is composed of a commercial conoscopic probe mounted on two high-precision motorized translation stages, allowing for the scanning of a maximum area of 30x30 cm2 at a measurement distance of 4 cm. The output is a topographic map consisting of a regular grid of points containing height information of the surface within a depth range (range of measurement) of 8 mm. The instrument is characterized by an axial/quota resolution of almost 1 μm with an overall accuracy better than 6 μm, and a lateral resolution of 20 μm.
The entire system is computer controlled, enabling to set the size of the area to measure, the sampling distance in both the scanning directions, the laser power, and the acquisition frequency. The acquisition time depends on the parameters set for the measurement, and increases with the sampling distance (for example, at the maximum scanning speed, it takes about 2.5 hours to mmeasure an area of 30x30 cm2 with a sampling step of 100 μ).
The instrument allows for the survey of surfaces of various reflectivity, with an angle of incidence very close to the grazing angle (i.e. it is possible to carry out scans with an incidence almost parallel to the surface). Furthermore, the measurement is effective on surfaces characterized by a high chromatic contrast, since the instrument is not sensitive to color gradients. Topographic maps can be processed with custom-made software as 3D models, grayscale images or color maps. Images can be further elaborated to simulate the direction of light source, thus resulting very similar to traditional raking light photos, but with the additional advantage of the color information which can be overlapped with a purposely developed software.
Indeed, 3D data can be effectively integrated with the information provided by other imaging techniques (RGB imaging, IR reflectography, UV imaging,…). This facilitates the interpretation of the results, allowing for an immediate identification of the measured features. Finally, the topographic map can also be used to evaluate the roughness of the measured surface.
Referent:
Raffaella Fontana raffaella.fontana@ino.cnr.it
